Splice is a simple but powerful video editor and maker for iPhone, iPad, and Android smartphones that makes it simple to create completely personalized, professional-looking movies. With this video editor installed on your smartphone, you can simply trim clips, apply slow-motion effects, and overlay several clips to make stunning movies that you will want to share. In this post, we will guide you on how to import Spotify music to Splice.
Selecting the ideal music for your movie is critical throughout the production process. Although Splice includes over 6000 royalty-free songs, you would like to utilize your favorite music streaming services like Spotify. Have you attempted to integrate Spotify music as background music to Splice? If not, continue reading this article to discover the solution to import Spotify music to splice.
- Part 1. Can You Use Spotify Music in Splice?
- Part 2. How to Convert Spotify Music to Splice
- Part 3. How to Add Music to Splice from Spotify
Part 1. Spotify & Splice: What You Should Know
Before attempting to integrate music from Spotify to a video, determine which audio formats Splice supports. Splice, according to its own documentation, supports a variety of video, audio, and picture types. You can use a Spotify music converter to convert your Spotify music into Splice formats.
We have established which audio formats are compatible with the Splice app. If you wish to add music from Spotify to a video in Splice, the audio files should be in the MP3, M4A, AAC, or WAV format. Spotify, on the other hand, provides its music songs in the protected OGG Vorbis format.
This implies that you cannot utilize Spotify music as background music for your video owing to its DRM protection. In other words, you cannot directly import Spotify songs into Splice. Fortunately, Spotify’s security may be readily bypassed using a third-party application called Spotify music downloader.
Part 2. How to Convert Spotify Music to Splice
As previously stated, we are unable to transfer and utilize Spotify music directly on systems not supported by Spotify. This is because Spotify protects its music songs using limited decryption technologies. This prohibits you from playing music in other locations, even if you have a premium membership and have downloaded music on your device.
In this situation, there is only one method to include Spotify music into video; you must first remove the DRM from Spotify and convert the music to a format allowed by Splice. To accomplish this unique job, we suggest that you use a third-party application, AudBite Spotify Music Converter — a professional music conversion tool.
AudBite Spotify Music Converter is an audio solution that enables all Spotify users to enjoy their music. Its download and conversion function enable you to save your favorite Spotify tracks in six popular audio formats, including MP3 and AAC. After conversion, it retains 100% of the audio quality and ID3 tags, so you do not have to worry about the output quality.
Main Features of AudBite Spotify Music Converter
- Download ad-free songs from Spotify without premium easily
- Convert Spotify music to MP3, AAC, WAV, FLAC, M4A, M4B
- Save Spotify music up to 320kpbs and with ID3 tags retained
- Support downloading Spotify music in batch at 5× faster speed
Step 1 Add Spotify track or playlist to AudBite
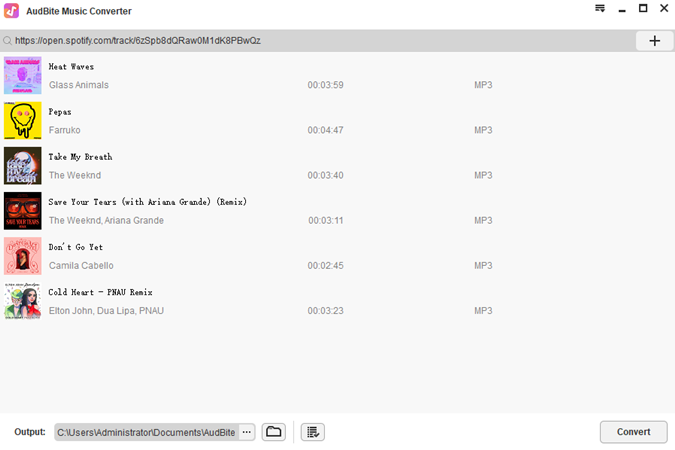
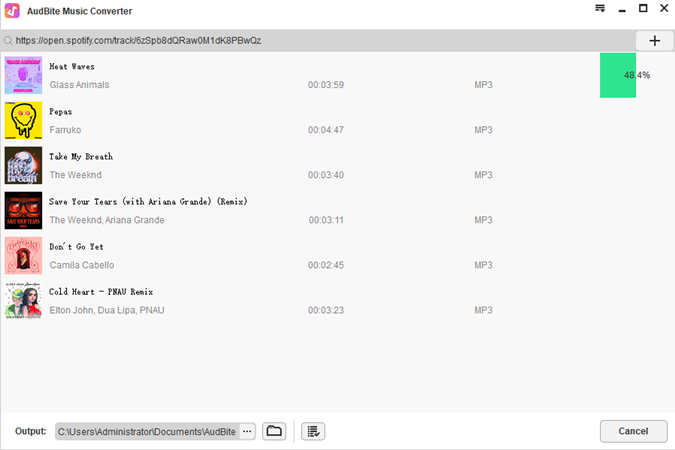
Begin by opening the music converter, which will immediately begin loading Spotify to your PC. Now go to your Spotify library and pick the songs you want to download. Drag and drop your chosen tracks into the conversion list, or paste the track or playlist’s URI into the search box.
Step 2 Configure the output preferences
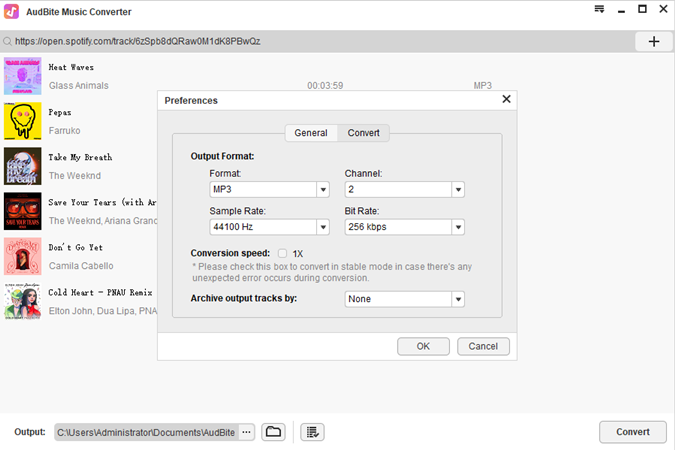
Once you have uploaded your chosen songs to the tool, go to the menu bar > Preferences to configure the output parameter. You may choose the output format in the Convert box by clicking on the Format arrow and selecting MP3 from the list of audio formats. Additionally, you may adjust the bit rate, sampling rate, and channel from there.
Step 3 Download Spotify to the computer
After you have saved your changes, click the Convert button in the bottom right corner. When the download and conversion processes are complete, you will have access to your Spotify music files. By selecting the Converted icon, you may go to the converted songs in the conversion list and choose the folder in which you want to store them.
Part 3. How to Add Spotify Music to Video in Splice
You have now converted all of the necessary Spotify tracks to MP3 or another Splice-compatible audio file. Begin editing your video in Splice and include them as desired.
For iPhone
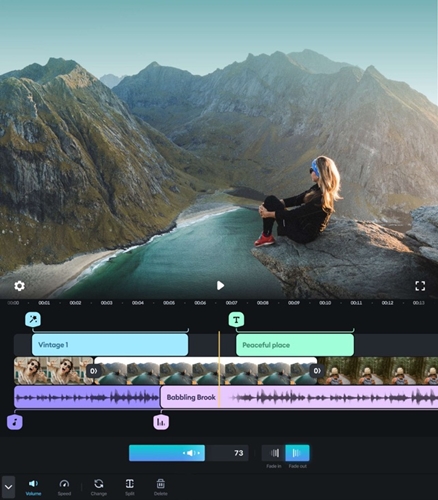
For iPhone and iPad users, following conversion, you may immediately transfer Spotify music to iTunes. Splice allows you to edit your video while adding music from iTunes.
Step 1. Use iTunes and import the converted Spotify tracks into your music collection.
Step 2. Next, either make a new video in Splice or open an existing one to add a soundtrack.
Step 3. Then, at the bottom of the page, touch the Music tab and choose iTunes.
Step 4. Finally, go through your Spotify library and choose tracks to use in your movie.
For Android
If you are using Splice Video Editor on an Android smartphone, you will need to transfer the converted music files first. Then, using Splice, you can include them in your video.
Step 1. Using a USB connection, transfer Spotify songs to your Android smartphone.
Step 2. In Splice, open a video and touch on Music to choose Imported Music.
Step 3. Browse your uploaded music files and then add a song to the video.
Conclusion
Splice’s video editor allows you to quickly create beautiful videos. Once you have completed the above steps, you may simply add music from Spotify to a video using Splice. Since then, you may take control of your Spotify playlists at any time and from any location. Hopefully, this import Spotify music to Splice guide will help you.


