Q:”How do I export a Spotify playlist to Excel?” – From Quora
It’s unquestionable that listening to music has become an essential part of most people’s lives. And often when you hear heart-touching songs, you don’t hesitate to add them to Spotify’s music library. As time goes on and songs accumulate, it is necessary to create playlists in order to have quick access to different songs. However, some of you may afraid that your playlists will be lost due to copyright issues, app anomalies, account block, etc. In this case, getting a way to export Spotify playlist to Excel is urgent. Don’t have an idea, right? Well, here we’ll guide you to make it and also shows a solution to download Spotify playlist to MP3.
Part 1. How to Export Spotify Playlist to CSV Using Exportify
Exportify is a handy open-source tool made by Watsonbox on GitHub, which helps to save Spotify playlists as CSV. It has a clean interface, is extremely easy, and extracts the data from the playlists into columns, including artist name, track URI, track duration, etc. You can apply this web-based tool to convert Spotify playlist to Excel and create a backup of your track lists. Follow the steps below.
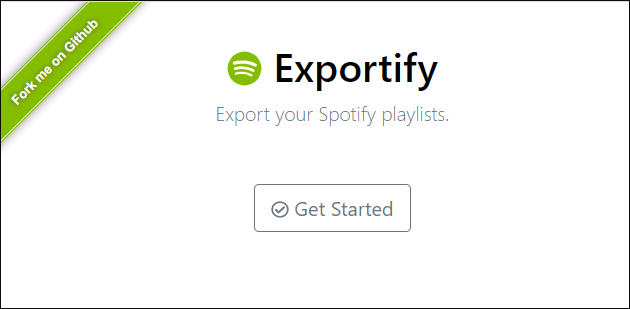
1) Go to Exportify official webpage and click the Get Started button.
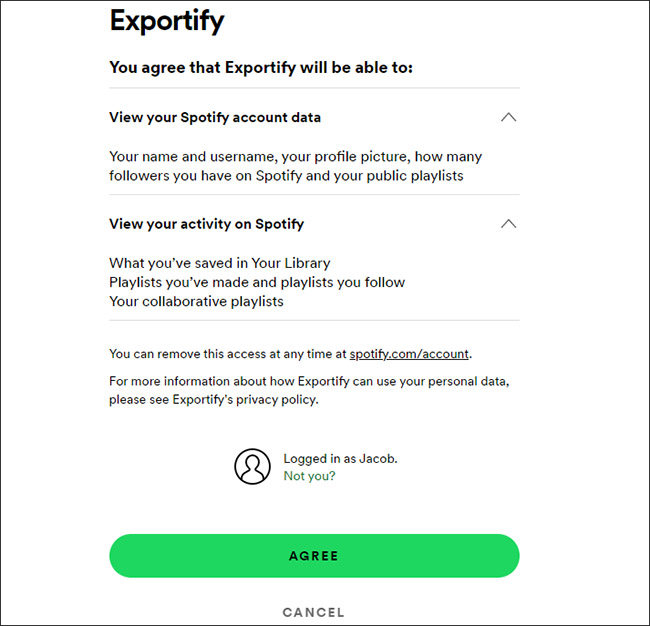
2) You’ll be asked to give permission to Exportify first for using your personal data, like your username, profile picture, and other publicly shared information, and viewing your created playlists under your Spotify account. If there is no problem, you can click on “AGREE” for confirmation and afterward log into your own Spotify account.
3) When you successfully log in to Spotify, Exportify accesses your playlists, loads, and displays them on the screen. You can click on the gear-shaped icon to enable ‘Include artists data’, ‘Include audio features data’, and ‘Include album data’ based on your needs. Then simply hit the Export button next to your specific playlist to save your Spotify playlist as a CSV file.
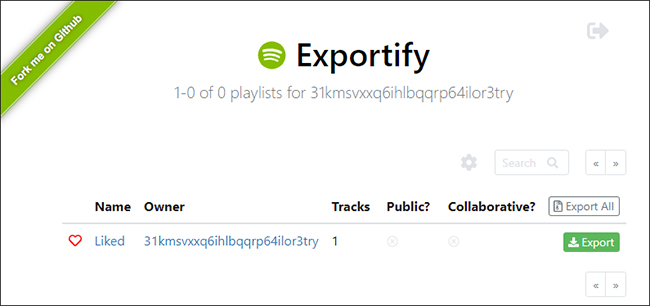
Note: If you want to back up all the playlists you have, click the Export All button at the right bottom. It saves all your Spotify playlists to a zip archive named Spotify_playlists.zip.
4) Soon after, you can check the downloaded CSV file(s) on your computer. It contains information such as track URI, track name, artist URI, artist name, album URI, album name, disc number, track number, track duration, album image URI, album release date, and more. You can then enjoy your wanted track by visiting an available track URI.
Advantages:
1. Sometimes, it’s time-consuming to load playlists from your authorized Spotify account
2. The synchronized playlist is not the latest one under the account, and Exportify cannot update data (playlists) in time.
Part 2. Download and Export Spotify Playlist to MP3 [No Premium]
It’s known to us all but inevitably that Spotify encodes its music in OGG Vorbis and encrypts files. Thus, only Spotify-permitted devices and platforms can play music directly. Even if you’re a premium with a subscription plan, the downloaded Spotify playlists can only listen to offline on the Spotify app, not everywhere.
To make all your copyright-locked music turn into unprotected files, you might as well try a tool, such as AudBite Spotify Music Converter, here. It decodes not only playlists, but also songs, albums, podcasts, and audiobooks. You can save these converted tracks on your local computer in the form of MP3, AAC, FLAC, M4A, M4B, and WAV. Or download music to USB drive, Google Drive, Dropbox, and more for lifetime storage. Handily, all Spotify files are accessible even without a network connection and you can play them offline on any device.
Main Features of AudBite Spotify Music Converter
- Download ad-free songs from Spotify without premium easily
- Convert Spotify music to MP3, AAC, WAV, FLAC, M4A, M4B
- Save Spotify music up to 320kpbs and with ID3 tags retained
- Support downloading Spotify music in batch at 5× faster speed
You should prepare everything ahead of time. Download the latest version of AudBite Spotify Music Converter from the official website. Install the Spotify application on your computer. Also, sign into your Spotify account to manage and classify your playlists, making them well-organized. Then, begin your downloading task by following the completed guide below.
Step 1: Select Spotify Playlists to Add
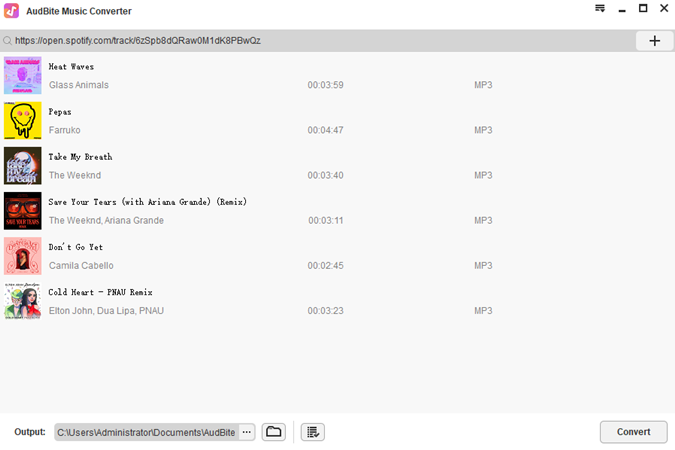
Quickly open your installed AudBite Spotify Music Converter on the desktop. Spotify will be loaded automatically when the converter runs. Go to your music library on Spotify (both free and premium accounts are accessible), select the playlists you intend to download, and add them to the conversion list. You can drag your preferred playlists to the converter’s interface, or copy the playlist’s URL and paste it into the search box of the converter, followed by clicking on the + button.
Step 2: Customize the Output Format to MP3
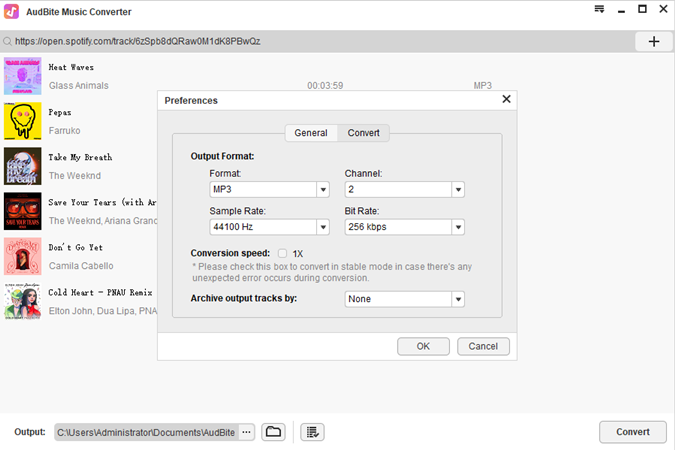
Click the Menu bar and pick the Preferences option, the setting window will show up under the Convert tab. In the displayed window, you can disappoint MP3 as your output format. Besides, based on your situation, set the channel, bit rate and sample rate as you want. To better manage all Spotify playlists, you can Archive output tracks by ‘Artist’, ‘Album’, or ‘Artist/Album’. Then click the OK button to save the changes.
Step 3: Download Spotify Playlists to MP3 Files
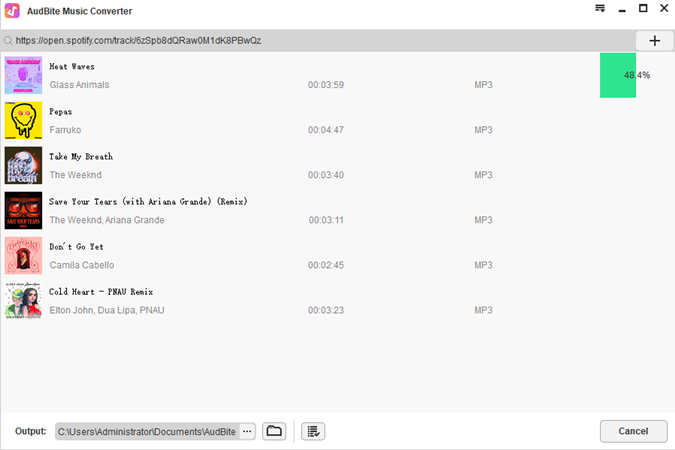
Finally, let AudBite Music Converter works by clicking on the Convert button, and the conversion process will start. You can clearly know how many tracks are downloaded, and which one is being converted. Once this converter finishes saving all playlists, simply click on the Converted button to check them on your local computer. These music files can become playable all the time and you can keep them safely for your personal use.
Conclusion
With Exportify, you can export Spotify playlist to CSV for backup. Use this post as a guide to complete the process seamlessly. Also, AudBite Spotify Music Converter is an excellent third-party tool for all your Spotify music conversions. It works well with both free and premium Spotify accounts. Now you can play your Spotify music anywhere and on any device.
