For music lovers, how to manage a large number of songs effectively is very important. As a result, there is a demand to find to find good music management software. If you’re also on the way to doing this, I would recommend MusicBee to you. It is a smart software that combines music playback and music file management. But not all music can be added to it. If you try to add Tidal to MusicBee, you will find it fails. To help solve such a problem, this post introduces 2 feasible methods. You just need to read and follow it.
Part 1. What You Need to Know about MusicBee
There are a lot of music management programs on the Internet, but what makes MusicBee stand out are its functional features and small size that don’t take up too much memory. As a professional tool, it can help people with a large number of music files to have easy management. MusicBee has the ability to search music files from local hard drives, mobile devices, and the Internet, and then make a classification. Also, it can create intelligent playlists and tags of the music files.
- Free to use
- Diverse formats support
- Customizable interface
- Powerful auto playlists
- Create and switch multiple music libraries
- Support broadcast
Advantages:
- Deficient lyrics
- No mobile version
- Incomplete song information
Disadvantages
Part 2. FAQs about MusicBee
Q1: Is there a system requirement for MusicBee?
A: Firstly, your devices should have at least 512 MB of physical RAM. If you use a hard drive, at least 50 MB of available space is needed. Other requirements include:
• Windows Vista, 7, 8/8.1, or 10 (32 or 64 bit versions)
• .NET 4.8 or higher
• Soundcard
• DirectX 8.1 or above
Q2: What’s the biggest collection MusicBee can handle?
A: So far, there are no official statistics about it. According to one user’s report, the library can contain over 500,000 files. You don’t need to worry about the collection for no one has complained of hitting a limit.
Q3: Can I use MusicBee on my mobile device?
A: Sadly, the mobile version of MusicBee does not exist. But there is a MusicBee Remote for Android. It’s a plugin that acts like a server so you can control MusicBee through the application on your Android device.
Q4: What audio formats are compatible with MusicBee?
A: The formats supported by MusicBee are as follows:
MP3, AAC, M4A, MPC, OGG, FLAC, ALAC, APE, Opus, TAK, WavPack, WMA, WAV, MIDI, MOD, UMX, XM.
Part 3. Add Tidal Music to MusicBee via AudBite Program
Most streaming music services will protect music with digital rights management encryption to prevent unauthorized access, and Tidal is no exception. That’s the reason why you can’t add tracks from Tidal to MusicBee directly. Besides, not all audio formats are compatible with MusicBee. In this case, you need the help of a powerful third-party program to remove the DRM protection and convert the music format to one that matches MusicBee for smooth playing.
AudBite Tidal Music Converter is a timely solution. Its effective functions and succinct interface make it an impeccable tool for downloading Tidal music to your computer. Without DRM protection, you will handily save the songs, playlists, or albums from Tidal as local files so as to play them offline on other devices like MP3 players, Android TV, and Bluetooth speakers. In order to improve the compatibility of the Tidal music, this tool entitles you to convert the audio formats. The choice is multitudinous, including MP3, AAC, WAV, FLAC, M4A, and M4B. And then you can import the converted Tidal songs to MusicBee for management.

Main Features of AudBite Tidal Music Converter:
- Download types of music files from Tidal to a local computer
- Support Tidal tracks, podcasts, albums, playlists, and more
- Preserve 100% lossless sound quality and ID3 tags
- Convert Tidal to MP3, AAC, WAV, FLAC, M4A, and M4B
- Download music at 5X faster speed for offline listening anywhere
Step 1 Choose the playlist for adding
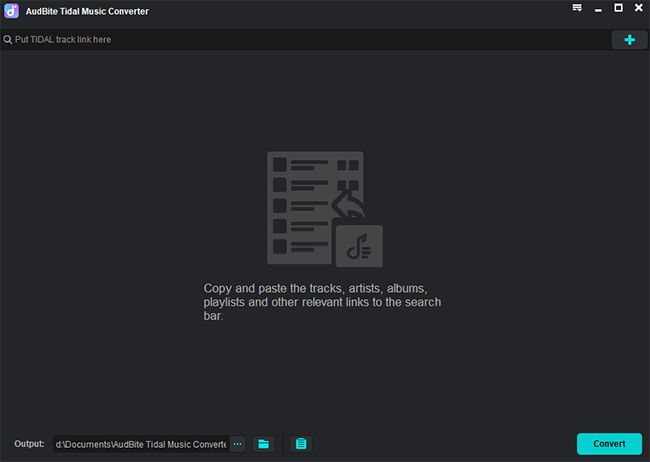
First of all, you’d better install the AudBite Tidal Music Converter on your computer. Then open it and wait for it to automatically open your Tidal app. Use your account to log in and decide the playlist you want to transfer to MusicBee. Next, you should add the playlist to the program by clicking Share – Copy playlist link. Paste it in the search bar at the top of the program’s interface. It will be loaded to show once you click the + button. Keep doing so until you add all the playlists you need.
Step 2 Adjust the output settings for MusicBee
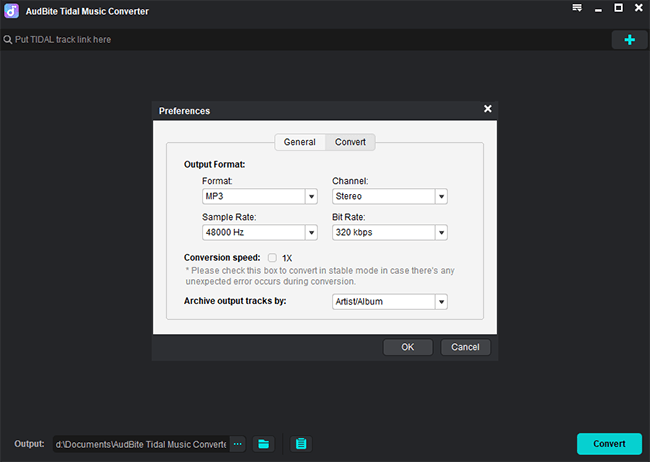
Before you officially start converting the Tidal playlist, you should adjust the output settings according to your preferences and the requirements of MusicBee. Open the menu section at the top of the program, then click Preferences – Convert. Choose one output format that is compatible with MusicBee. If you want, you can change the channel, bit rate, and sample rate as well. The right settings can enhance your music enjoyment.
Step 3 Start playlist conversion for MusicBee
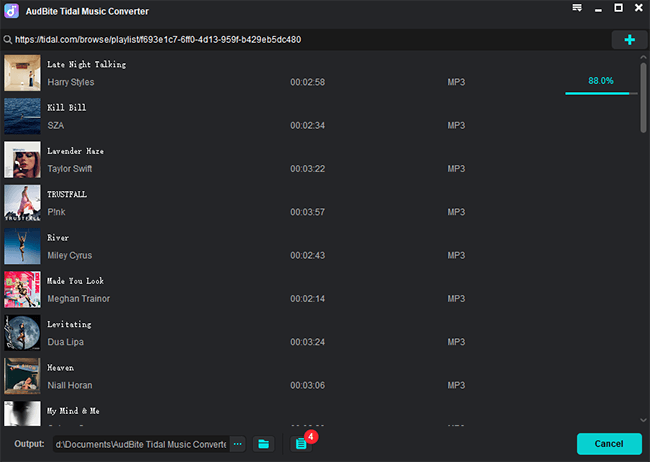
Once everything is done, you can start the downloading and converting process. You just need to click the Convert button and wait for a while. Basically, the time it takes depends on the numbers you add for converting. But with the 5X speed, this won’t take too long. When the process is finished, you can hit the Converted icon to find the location of the local Tidal music file on your computer.
Step 4 Add Tidal downloads to MusicBee
1) Install and launch the MusicBee app on your computer.
2) Click the MusicBee at the top of the interface. Then hit on File – Scan Folder for New Files.
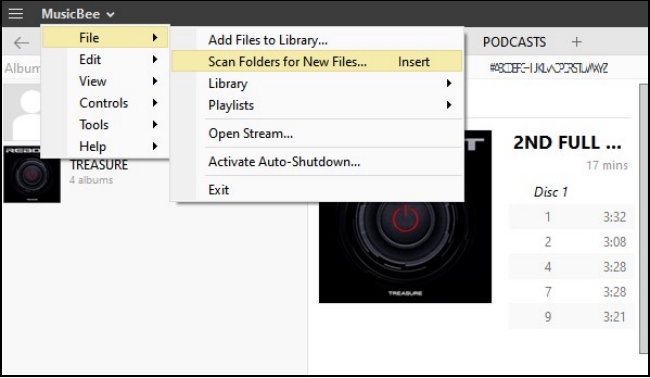
3) Head to the folder that contains your downloaded Tidal playlist and click it. It will be imported to your MusicBee library. You can now enjoy your Tidal playlist offline on MusicBee.
Note: The alternative file import method is to drag and drop the music directly to MusicBee.
Part 4. Transfer Tidal to MusicBee via MusConv
Similarly, you can use MusConv to achieve the transfer between Tidal and MusicBee. MusConv is a good migration program that enables you to transfer your playlists to many music services. You can add your Tidal playlist to MusicBee with these steps.
1) Download MusConv from its official website and open it on your computer.
2) Select Tidal as the source music platform. Then choose the playlist you wish to transfer.
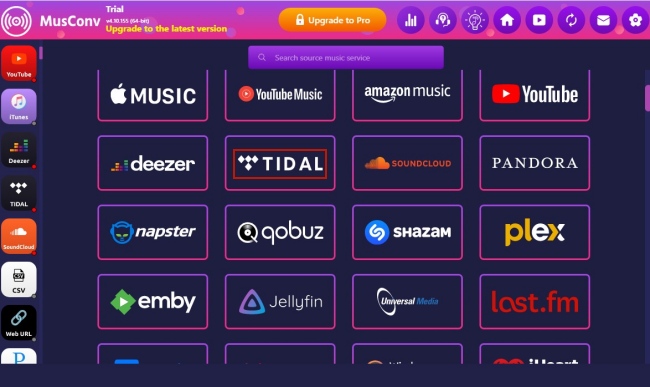
3) Click on MusicBee to set it as the destination. Then the playlist will be transferred and you can play Tidal music on MusicBee with ease.
Part 5. Wrapping up
Although MusicBee does not support Tidal officially, you can make use of a third-party tool to achieve your goal. When you require a fast and simple transfer, you should try MusConv to achieve it effortlessly. It will connect your Tidal and MusicBee accounts so as to migrate the account content. However, for the purpose of perpetual offline management and playback, the AudBite Tidal Music Converter is the way to go. After you use it to download Tidal music, it’s pretty easy to add Tidal to MusicBee.


